|
With the spars completed, I next turned to assembling the wing ribs. With the pre-punched holes in both the ribs and the spar webs, things matched up very well.
|

|
There were a few places on the inboard ribs that interfered with the spar caps. With the rib touching, it would not sit properly against the spar web.
|

|
To solve this, I simply removed a bit more material from the offending ribs until the interference problem was gone.
|

|
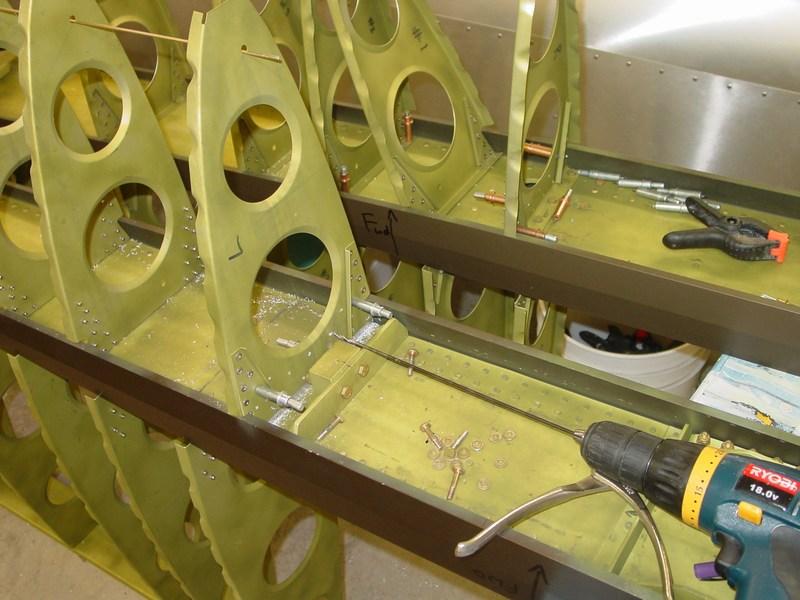
With all the rear ribs clecoed in place, I fit the rear spar. To ensure the ribs were all in the same alignment, I used my 4 ft level set across the flanges. This allowed my to drill and cleco the rear spar accurately. The rear spar was previously pilot drilled for the ribs, but because this was not a pre-punched part, there were lots of minor differences. A bit of hand fitting was required for a perfect fit.
|

|
Rear spar attached.
|

|
Attaching the front ribs is very simple. The holes match up perfectly with the rear ribs, and it is just a matter of loosening the clecos to and poking them through the front ribs. Easy!
|

|
The front ribs go on in about 10 minutes, and now it really looks like a wing. I still need to prime the outboard wing ribs after all the holes are drilled and deburred.
|

|
Both spars with wing ribs.
|

|
There is a small gap on the forward ribs due to the spar caps not sitting flush with the web. This requires a 1/8" spacer under the rib flange. I had planned on just using scrap from making all the angles, but after considering the work required to make 100" of combined straight edges, I decided to just purchase 6 ft of 1/2" x 1/8" plate from Wicks. Note: After getting the material, I realized that I actually needed double that! Oh well, I order something every week anyway, right?
|

|
The spacers were measured out and cut on the band saw. This is definitely the way to go with the spacers instead of using scraps!
|

|
The spacers are then slid under the rib and positioned to drill.
|

|
The root ribs are aligned to the brackets. To help line them up to the other ribs, I used a length of piano hinge in the tooling hole. This worked well.
|

|
Here is another place the 12" long drill bits earn their keep. At this point all the ribs are removed and primed (if needed), holes are deburred, and parts are prepared to rivet back on to the spars.
|

|
Reassembling the ribs and spacers on the spars.
|

|
All the ribs clecoed in place. You may notice that the #1 rib (next to the root rib) has been left out.
|

|
The #1 rib interferes with riveting the root rib, and thus has to be left out until later.
|

|
You can see the tight fit with the rivet gun. The #1 rib is just pushed back out of the way.
|

|
Some of the rivets are very close to the bolts and nuts. I needed a spacer to get me past the nut.
|

|
I found a R/C wheel collar filled that role nicely. I don't know the exact size though. It was just something I had in my parts box...
|

|
With the root rib installed, I then riveted the #1 rib, and then the remaining ribs. One note here: the plans call for CCP-44 rivets everywhere, but the first 4 ribs really need CCP-46. Plan to use a few -46's here. I still have some left, so I'll see if I need to order more -46's before this project is finished.
|

|
Riveting on the rear spar.
|

|
All rivets complete! The skeleton is ready to begin skinning.
|

|
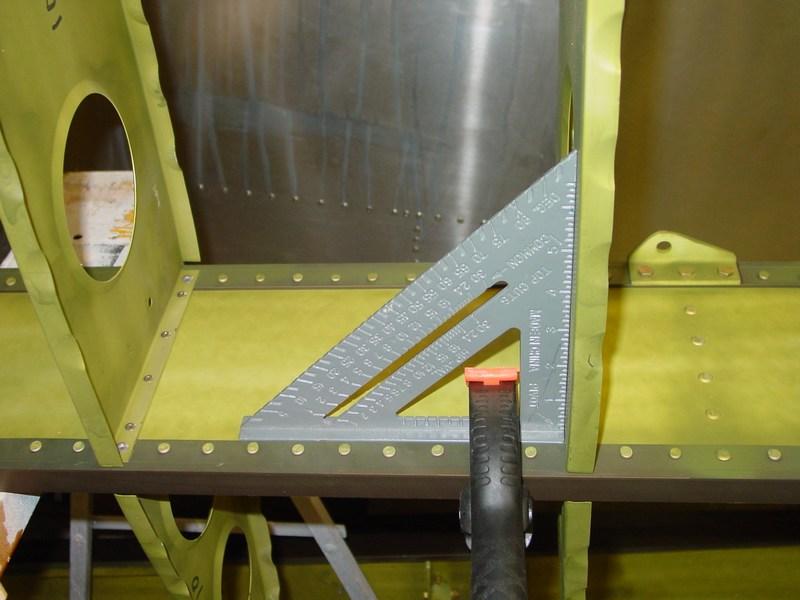
Despite checking the wing for squareness, after everything was riveted it had a slight "lean" to it.
|

|
However, with just a few pounds of pressure on the root end the ribs squared right up. I don't think this will be a problem once I get the skeleton braced for skinning.
|