|
The fuel tank is held in place by steel or aluminum straps. The kit doesn't include any material for this, so you are on your own here. I purchased some 1" wide steel strapping from Aircraft Spruce. I actually bought 4 4'-lengths, thinking I could use two to make the 4 straps, and keep two as backup. Actually, 4' wasn't enough to make two straps from, so I used all 4 lengths (with lots of waste).
|

|
The straps were scuffed heavily to remove any surface corrosion, then primed.
|

|
The straps fit pretty well.
|

|
The Sonex fuel tank is a heavy-duty rotationally molded tank. Total capacity is 17 gallons. It has fitting for the fuel sight tube, a capacitance fuel probe, and the sump and pickup lines. Since I am using the optional capacitance probe, I plugged the sight tube lines. The pickup gets a finger strainer and shutoff valve.
|

|
The tank is test-fit in place. So far it looks like it will go in OK, I guess I'll see when the glare shield is mounted.
|

|
I used a bulkhead fitting to pass the fuel line through the firewall. I wasn't too comfortable simply routing the fuel line through a rubber grommet mounted in the firewall.
|

|
From here, the fuel line makes a nice straight run to the fuel tank. I like this routing better than putting the line down by the passenger side rudder pedals.
|

|
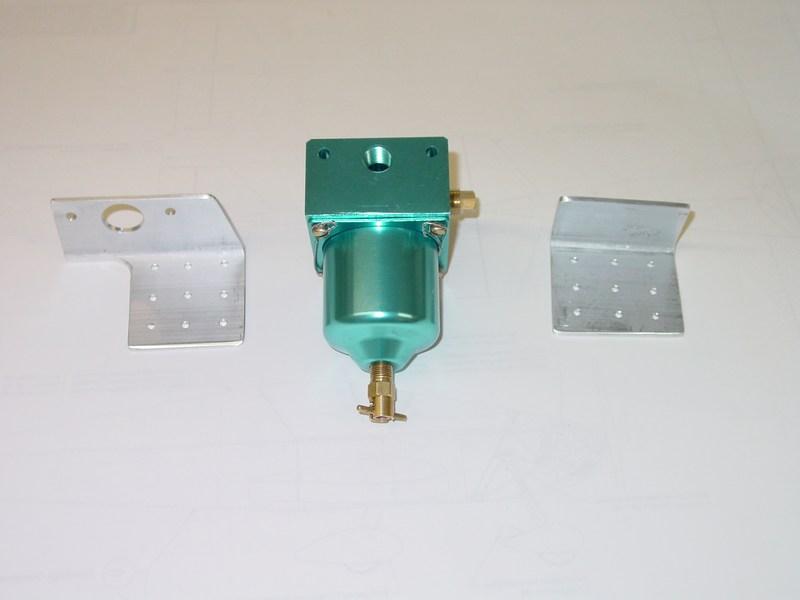
I purchased a gascolator from Aircraft Spruce (PN 05-00632). The ports are arranged so that fuel flows in through the mounting side, and out on the ends. This would be fine, except for the fuel line interference with the rudder pedals.
|

|
I fabricated a bracket to mount the gascolator to that rotated it 90 degrees, thereby allowing me to bring the fuel line through the firewall away from the rudder pedals.
|

|
I am planning on mounting the gascolator on the lower left of the firewall. This shows how the bracket should route the fuel line. Additionally, placing the gascolator down this low will help trap contaminants, as well as making the drain plug easy to reach with the cowl in place.
|

|
Gascolator mounted. I replaced the nyloc nuts with all metal loc-nuts. The drain valve will be located just above the cowling, making it easier to drain the sump.
|

|
To install the tank, you first must install the glareshield. It may not seem apparent as to why, but this is really the only way. The tank straps are bolted in place through the glareshield, as well as several bolts through the front of the glareshield. There just isn't any way to put the tank in first :-(
|

|
Unfortunately, the bolts that hold the tank straps together aren't easy to reach. The solution was to dive in head first and work on them from the floor. This is quite a tight fit!
|

|
It wouldn't be so bad if the spar tunnel wasn't in the way (not that it was an option for me...) It didn't take too long to get things tightened down though.
|

|
I was worried that the tank stops wouldn't be in the right place, so I didn't drill the holes for them. The tank stop angles did have pilot holes in them, however. In retrospect, the pilot holes should have been left off and just drilled from the top side through both the glareshield and the tank stops.
|

|
I had to make a template of the hole positions and transfer that to the glareshield. It was a pain, but easier than making new tanks stops.
|

|
Here you can see the underside of the tank. The tank straps are in the groves nicely. The Sonex capacitance fuel probe in place, and a smattering of wiring has been run inside. (I'll clean this up later on...)
|