|
The kit includes pre bent flap skins, formed ribs, and laser cut flat drive plate. These parts are just about ready to start fitting together. Minor deburing on the scotchbrite wheel was all that they needed.
|

|
The flaps start with fitting the flap drive plate to the end rib.
|

|
Drive plates fitted and clecoed.
|

|
No sooner had I fitted the drive plates than I realized I had misread the plans and drilled the holes too big! The plans show a 3/8" radius around the hole, but a 3/16" diameter hole. Rats! New parts from Sonex are required.
|

|
The flap skins are BIG! Somehow seeing the factory planes didn't impress upon me how big these flaps are quite like holding the skins in my hands.
|

|
The flap skins need their root ends trimmed to snug up against the fuselage side. I used my Wiss offset snips to make the cuts.
|

|
Although the snips leave the edges a little messed up, a few minutes with a file smoothed things out. This is a whole lot faster than using a dremel tool.
|

|
Centerlines on the rib flanges help to align the ribs.
|

|
Rivet lines drawn on the flap skin.
|

|
The rivet pattern is the same for all 4 flap ribs, both top and bottom. To speed up laying out the rivet locations, I first created a template on some scrap. I then used the template to transfer the rivet layout.
|

|
As I had done on the tail feathers, I first drilled the end holes along each rib. This allowed me to watch for the rib centerline through the hole, getting rib precisely located.
|

|
To position the middle ribs, I used a long wood dowel to tap the rib little by little into alignment. It worked out very well, and was quick and easy to do.
|

|
All 4 ribs are fitted and clecoed.
|

|
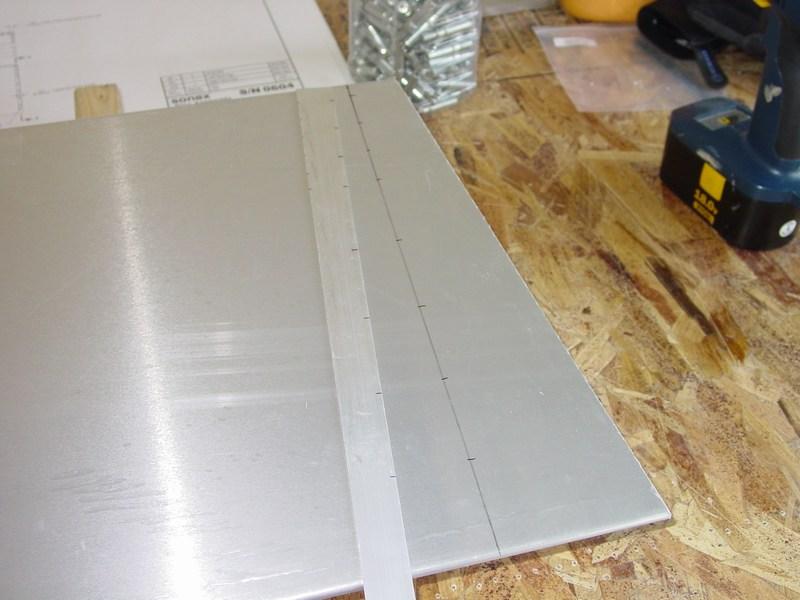
The hinges were drilled using my piano hinge template. There are 70 holes in each one! It takes a while....
|

|
Fitting and drilling the hinge. You can see my hinge spacer tool to get the 0.057" clearance the plans call for.
|

|
More drilling and clecoing.
|

|
Hinge drilled up to #30 and ready to debur.
|

|
The drive flap rib. I will have to wait to rivet it until I get the new drive plates from Sonex.
|

|
Next, everything is disassembled and deburred.
|

|
The back side on the rib flanges are a bit challenging to debur. I prefer to use a maroon scotchbrite pad to knock off the burrs. This does double duty by scuffing up the flange before priming.
|

|
Finally, the flap is riveted up.
|

|
More riveting.
|

|
There are quite a few rivets in this thing, and it takes a while! My forearms are getting quite a workout from the cleco pliers.
|

|
Flaps complete, minus the drive plates.
|

|
I finally received new flap drive plates from Sonex. These are not very complicated parts, but I didn't have enough 1/8" plate to make new ones, so I just ordered them. I matched the new ones up to the old ones and match drilled to ensure the fit remained the same.
|

|
End rib and drive plate clecoed in place.
|

|
The drive plate interferes with the rivets on the flap skin. There is not enough room to get a rivet gun in there if the drive plate is already attached.
|

|
The drive plate is removed so the top rivets can be set.
|

|
Lastly, the drive plate is riveted in place to complete the flaps.
|