The Sonex uses a two part canopy and windscreen. The forward windscreen in a flat-wrap of acrylic sheet, while the movable part is a free blown acrylic bubble. The bubble comes oversized, and must be trimmed and attached to a frame.

|
The first step in the canopy installation is to fit the forward windscreen, and that starts with the windscreen bow. The kit now includes a pre-bent bow, made from 1/2" solid 6061T6 rod. The bow comes a bit long, and must be trimmed to fit. The bow leans forward 60 degrees, running through the elongated hole and doubler in the upper fuselage longeron. To get the bow to fit properly, I trimmed 1" off each end.
|

|
The fit of the bow through the hole was very good, requiring only minor enlargement with a rat tail file. What's more impressive is that the hole through the fuselage side was already pilot drilled. (Actually, I mistakenly put a rivet in this hole, and had to drill it out.) This hole lined up perfectly with the bow! Once again the plans amaze me with their accuracy.
|

|
The fuselage sides have a 3/4" strip that extends above the longeron. This strip is what the windscreen will attach to, but it must be bent over to match the natural angle of the windscreen. I did not pre-bend this before assembling the forward fuselage, and I had wondered it this was going to cause me some grief later.
|

|
What I did was to use a 12" length of wood and my rubber tipped hammer to bend the flange over. This worked great! The wood spread the bending out over a larger area, and I could run up and down the length of the flange bending it to suit. The edge turned out nice and crisp because the longeron acted like a bending brake underneath.
|

|
With the bow in place and the skin flange bent, it was time to start fitting the windscreen. The windscreen comes cut slightly oversized and will be trimmed down to size. The bent flanges do a great job holding the windscreen in place while you mark everything.
|

|
The canopy starts off oversized, and you'll start out not fitting well. Depending on how high you set the bow, the back end may fit better than the front. By trimming 1" off each side of the bow, the rear end of the windscreen fit pretty well. The front needed about 1/2" trimmed off each side, so I put on a straightedge and marked new cut lines.
|

|
The factory marked the rear cut line on the windscreen blank. It looks like a router was used to cut about half way through the sheet.
|

|
All the trimming on the windscreen was done on the band saw, as recommended by Sonex. This worked pretty well. The hardest part is supporting the rest of the sheet while you cut. Even the curved section was easy to cut out.
|

|
The band saw leaves a fairly nice finish, but it still needs to be cleaned up. The edges are block sanded with 80, 150, and 220 grit sandpaper. The will remove any small nicks that ay instigate cracks along the edges.
|

|
After all the edges are sanded, the windscreen is once again clamped into position to prepare for drilling.
|

|
I left the protective coating on both sides of the windscreen, so centering the hole into the bow required a new tool. I used two strips of scrap 0.025" to make a hole centering tool.
|

|
The upper strip has a #40 hole in it positioned so that when the lower strip is held against the 1/2" diameter bow, the hole falls right into the center. I then marked the location with a sharpie and drilled. It worked great!
|

|
The technique I used was to drill the pilot hole through the windscreen and bow with a #40 bit. I used a slightly dull (i.e. not a brand new) bit for this, and it worked great. The bow backed up the acrylic, so the hole came out very nice.
|

|
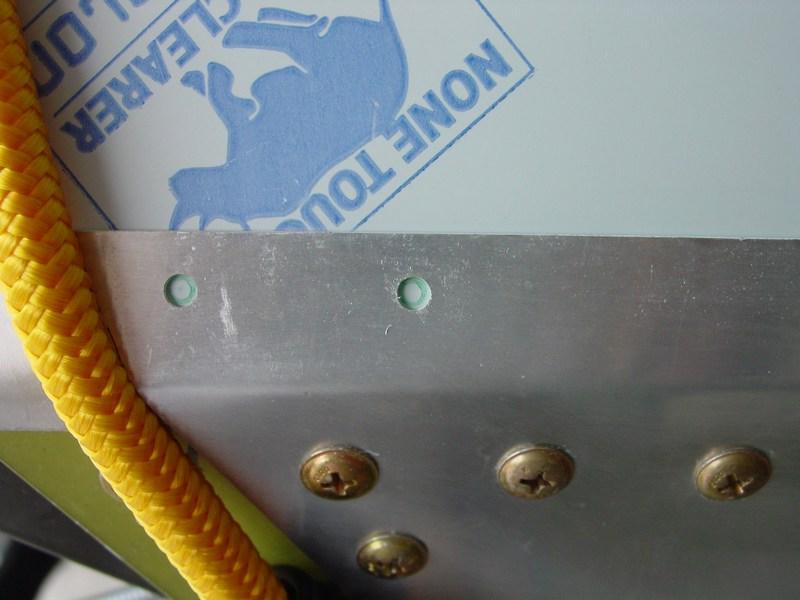
Because the side holes have nothing to back them up for drilling, I marked them with a sharpie to be drilled flat on the bench.
|

|
For these holes, I used 5/32" and 3/16" acrylic specialty drill bits. Thess bits don't really twist through the material as much a scrap a hole through. They worked great.
|

|
After finishing all the screw holes, I removed everything to prepare for final assembly. The canopy strap and windshield bow were masked off and painted black.
|

|
Turning the nuts on the front windshield bolts requires either 6 foot arms or a special tool! I turned my 3 ft straightedge into a box wrench for this job by carefully cutting and filing a notch into the end.
|

|
A strip of tape holds the nut in the "wrench" and assembly went very smoothly after that, even by myself.
|